Setting Up Microsoft Defender for Endpoint with Business Premium
Setting Up Defender for Endpoint with Microsoft 365 Business Premium
Microsoft Defender for Endpoint (MDE) is one of the best features bundled with Microsoft 365 Business Premium, yet many organisations never get around to configuring it properly. Out of the box you get next-gen antivirus, endpoint detection and response (EDR), attack surface reduction, and web filtering — all managed through Intune. This guide walks through the full setup from activation to a verified, protected endpoint.
Prerequisites
- A Microsoft 365 Business Premium licence (or trial)
- Global Administrator or Security Administrator role
- Devices enrolled in Microsoft Intune
- Windows 11 Pro or Enterprise endpoints
If your devices are not yet enrolled in Intune, do that first. MDE onboarding relies on Intune device management being in place.
Steps
1. Activate Microsoft Defender for Endpoint
Before configuring anything, you need to activate the MDE service.
- Sign in to the Microsoft 365 Defender portal at https://security.microsoft.com
- You may see a welcome screen prompting you to set up Defender for Endpoint. Click Start using Microsoft Defender for Endpoint.
- If the portal is already active, navigate to Settings > Endpoints > General > Advanced features.
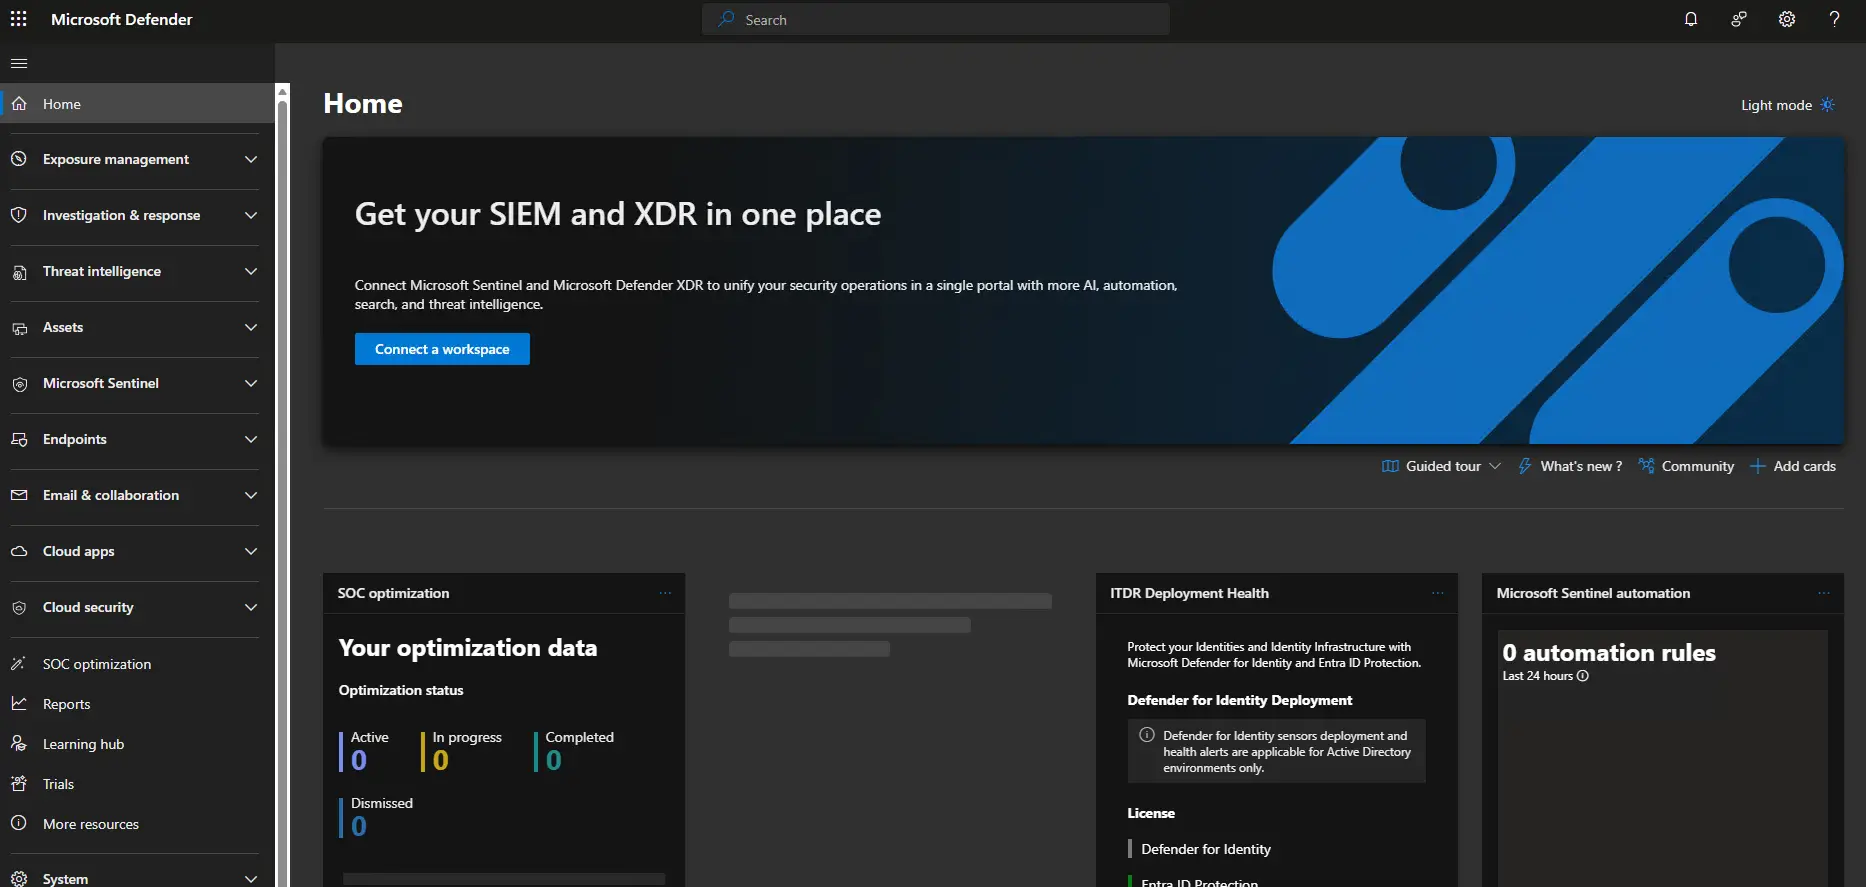
The initial provisioning can take a few minutes. Once complete, the Endpoints section will become available in the left navigation.
2. Connect Microsoft Intune to Defender for Endpoint
This is the critical step that allows Intune to push onboarding configurations and security policies to your devices.
In the Defender portal:
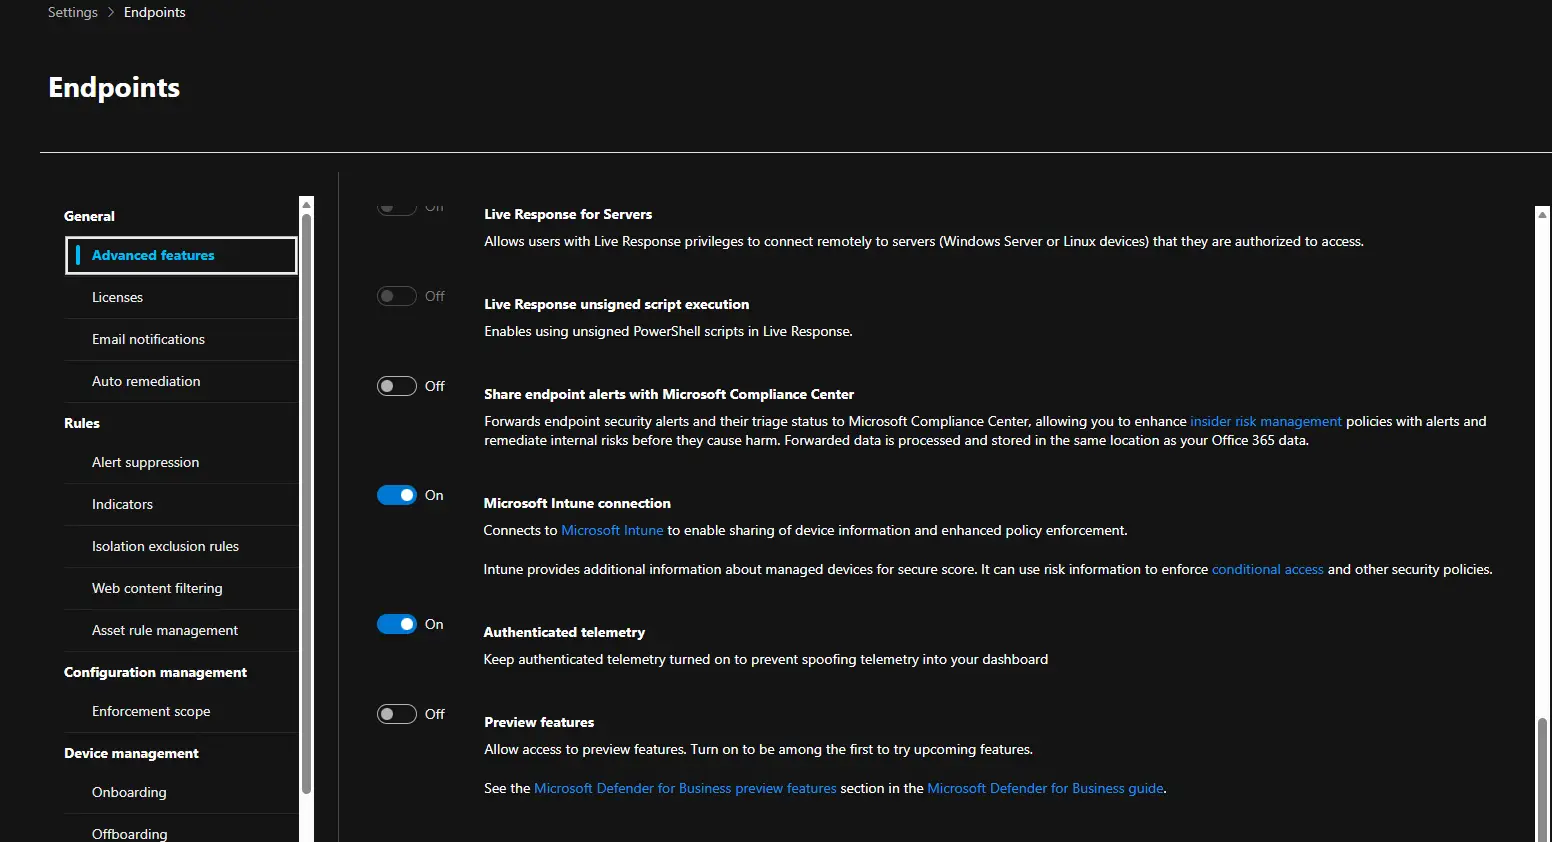
- Go to Settings > Endpoints > General > Advanced features
- Ensure Microsoft Intune connection is toggled On
- Click Save preferences
In the Intune admin center:
- Navigate to Endpoint security > Microsoft Defender for Endpoint
- You should see the connection status. Toggle the following:
- Allow Microsoft Defender for Endpoint to enforce Endpoint Security Configurations — On
- Connect Windows devices version 10.0.15063 and above to Microsoft Defender for Endpoint — On
- Click Save
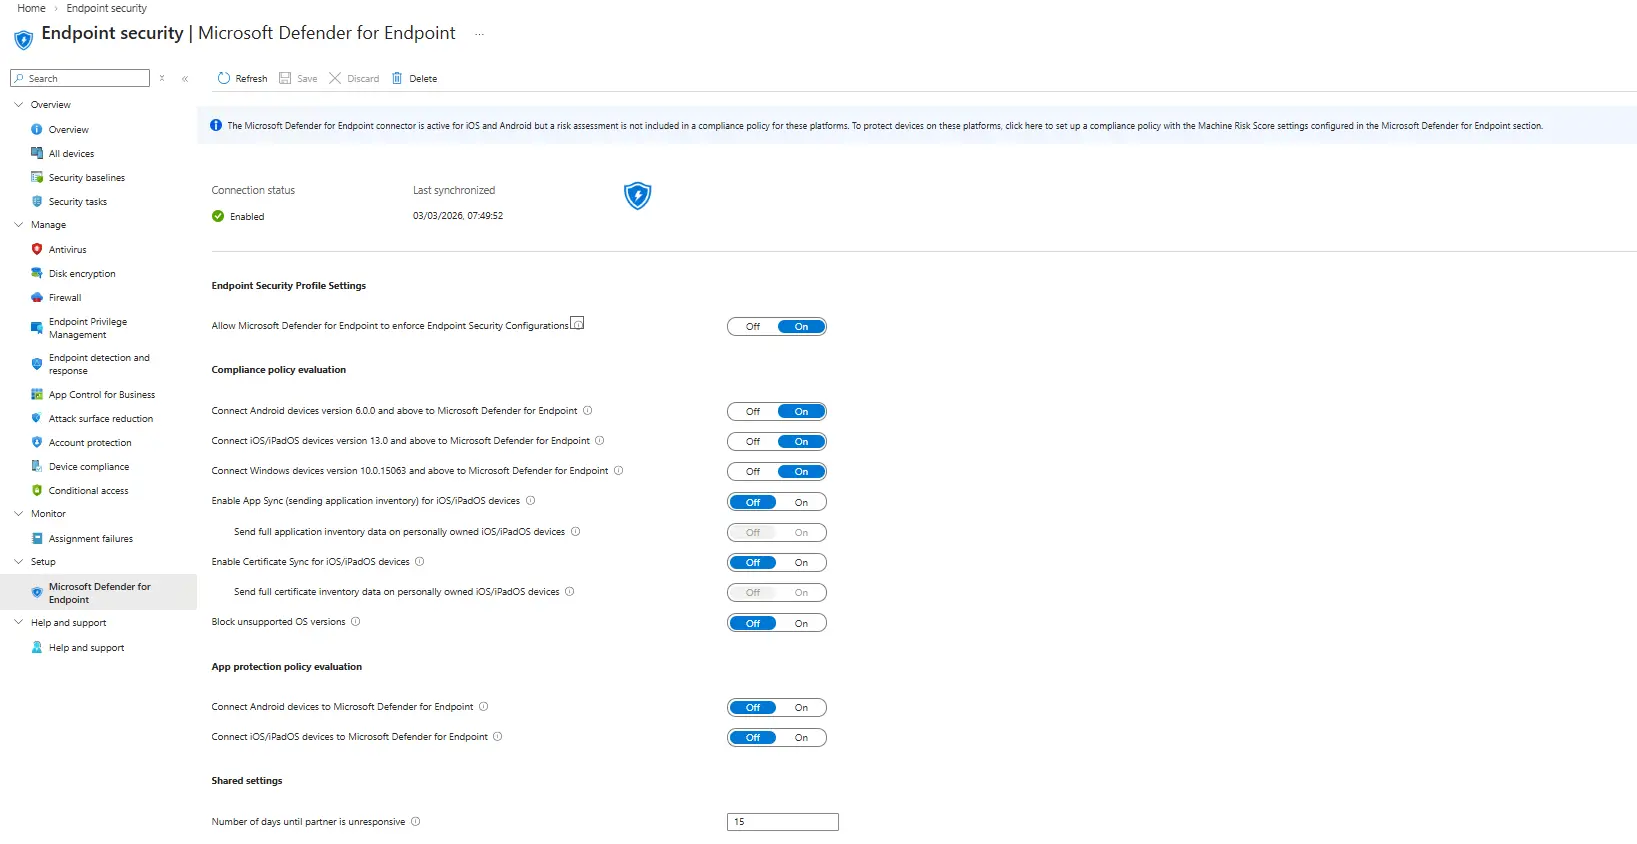
Both sides of the connection must be enabled. If you only toggle it in one portal, onboarding will fail silently.
3. Configure Next-Generation Antivirus Policy
The antivirus policy controls real-time protection, cloud-delivered protection, and scan behaviour.
- In the Intune admin center, go to Endpoint security > Antivirus
- Click Create policy
- Platform: Windows
- Profile: Microsoft Defender Antivirus
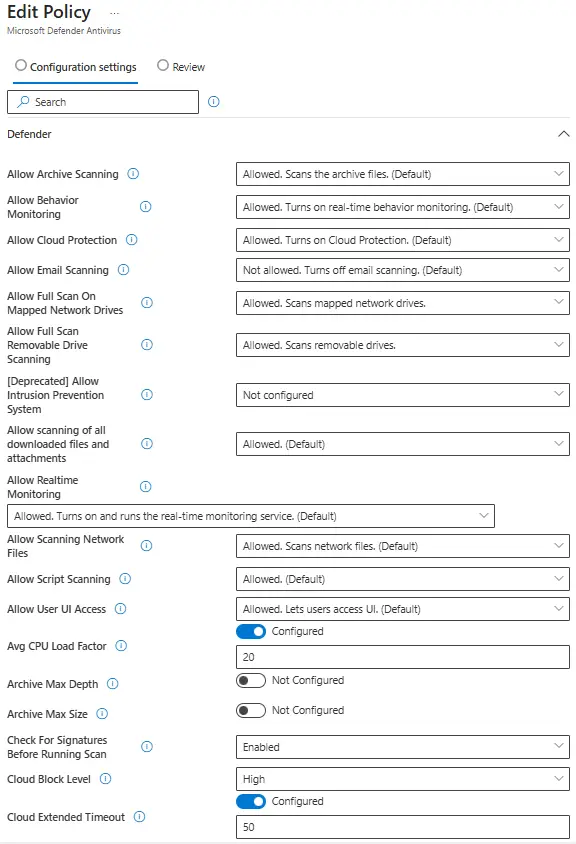
- Name the policy something appropriate that fits with your naming convention. For example mine is going to be: DE1001 - Baseline AV Rules. Most of these rules are on by default and only the following we will change the defaults below, you can enable the defaults if you want to be sure but they will be applied automatically if left not configured. Please fine tune all settings specifically to your org.
- Configure the following recommended settings:
- Allow Full Scan On Mapped Network Drives — Allowed.
- Allow Full Scan Removeable Drive Scanning — Allowed.
- Avg CPU Load Factor — Configured, 20
- Check for Signatures Before Running Scan — Enabled
- Cloud Block level — High
- Cloud Extended Timeout — Configured, 50
- Enable Network Protection — Enabled (Block)
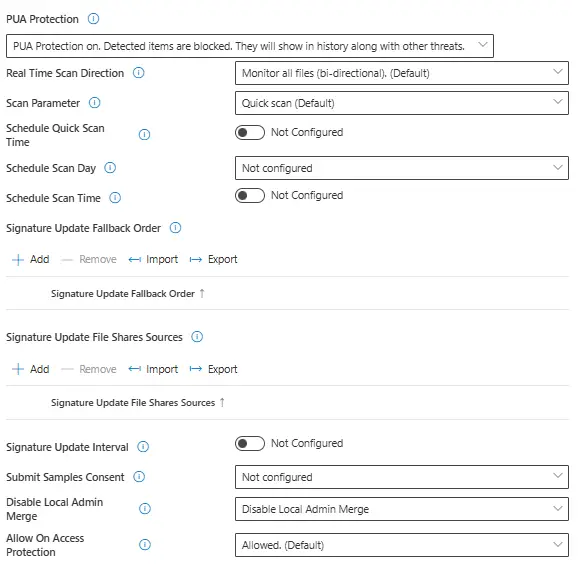
- PUA Protection - PUA Protection On
- Disable Local Admin Merge - Disable local Admin merge
- Assign the policy to All devices or a specific device group
- Click Create
4. Configure Endpoint Detection and Response (EDR)
EDR provides advanced threat detection, investigation, and response capabilities.
- Go to Endpoint security > Endpoint detection and response
- Click Create policy
- Platform: Windows
- Profile: Endpoint detection and response
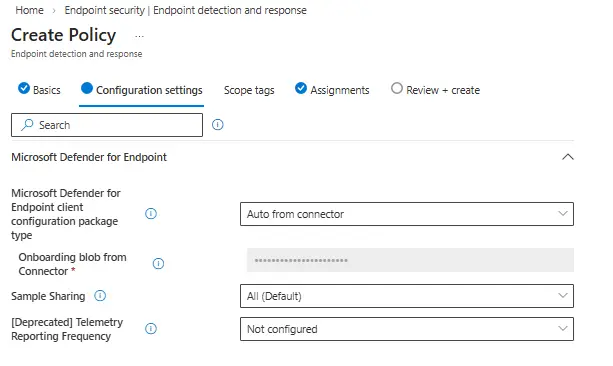
- Configure the following:
- Microsoft Defender for Endpoint client configuration package type — Auto from connector
- Sample sharing — All
- Assign to All devices or a specific device group
- Click Create
The “Auto from connector” option uses the Intune-MDE connection you set up in Step 2 to automatically handle the onboarding package. No need to manually download and upload it.
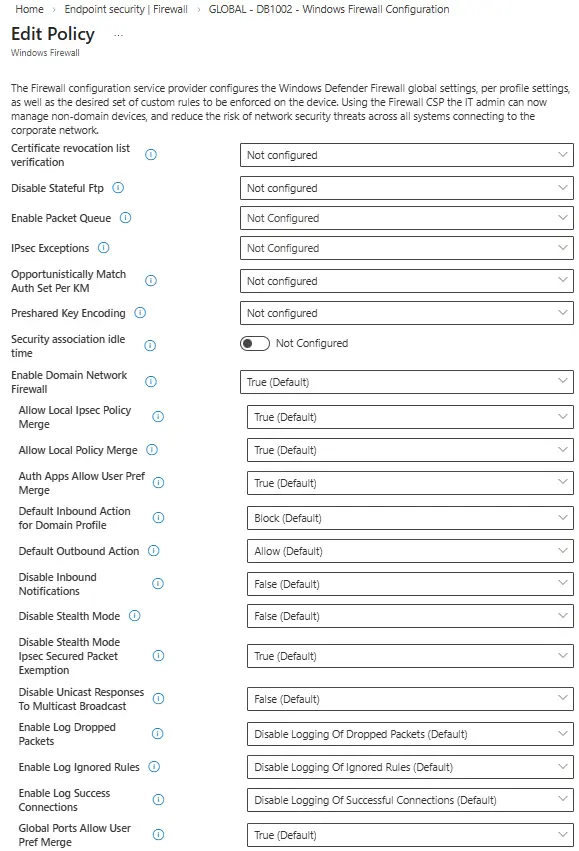
5. Configure Firewall Policy
A baseline firewall policy ensures consistent network protection across your fleet.
- Go to Endpoint security > Firewall
- Click Create policy
- Platform: Windows 10, Windows 11, and Windows Server
- Profile: Microsoft Defender Firewall
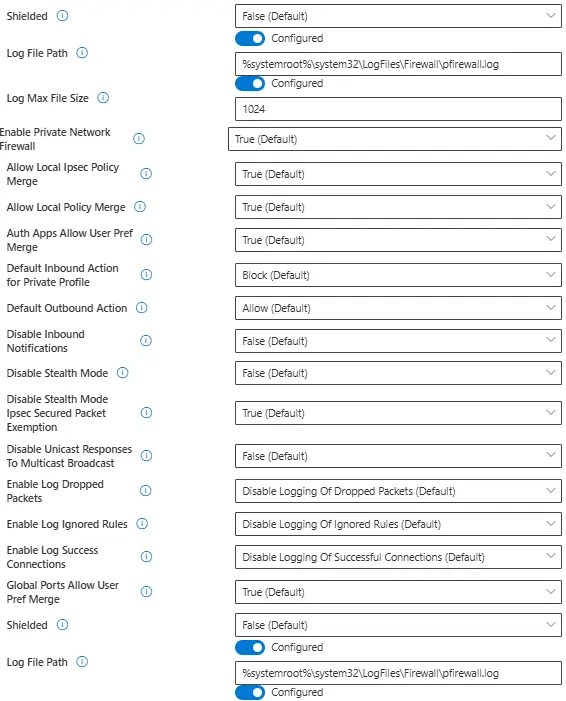
- Recommended settings:
- Log File Path — %systemroot%\system32\LogFiles\Firewall\pfirewall.log
- Log Max File Size — 1024
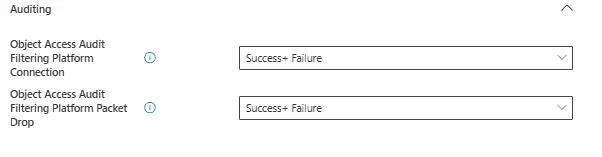
- Object Access Audit Filtering Platform Connection — Success + Failure
- Object Access Audit Filtering Platform Packet Drop — Success + Failure
- Assign and create the policy
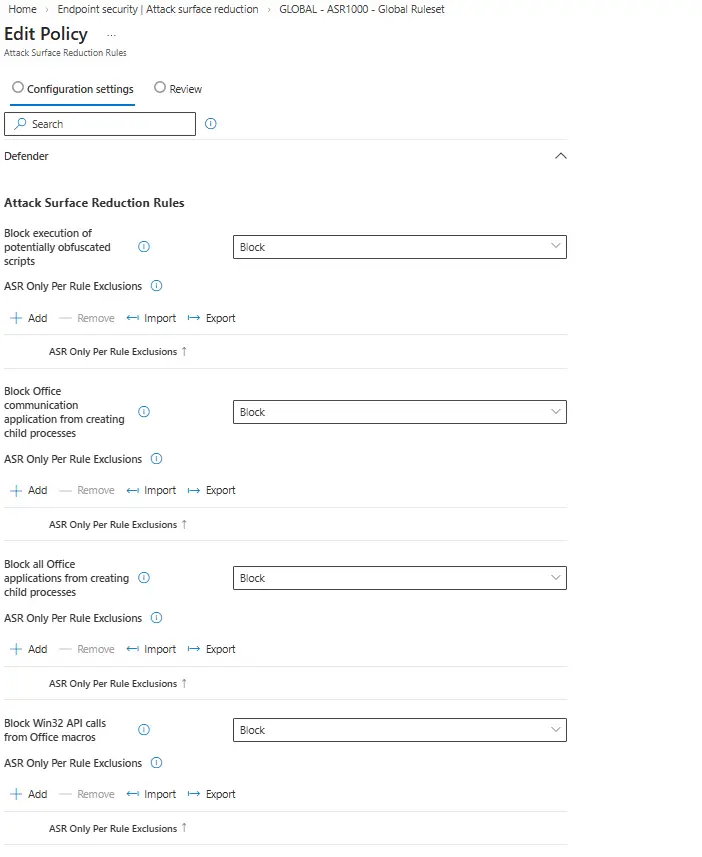
6. Configure Attack Surface Reduction (ASR) Rules
ASR rules are one of the most powerful features in MDE. They block common attack techniques at the endpoint level before malware can execute.
- Go to Endpoint security > Attack surface reduction
- Click Create policy
- Platform: Windows
- Profile: Attack surface reduction rules
Start with Audit mode if you are unsure about the impact on your environment. Review the audit logs in the Defender portal for a week or two, then switch to Block once you are confident there are no false positives affecting business applications.
Recommended ASR rules to enable:
| Rule | Recommended Mode |
|---|---|
| Block executable content from email client and webmail | Block |
| Block all Office applications from creating child processes | Block |
| Block Office applications from creating executable content | Block |
| Block Office applications from injecting code into other processes | Block |
| Block JavaScript or VBScript from launching downloaded executable content | Block |
| Block execution of potentially obfuscated scripts | Block |
| Block Win32 API calls from Office macros | Block |
| Block credential stealing from the Windows local security authority subsystem (lsass.exe) | Block |
| Block process creations originating from PSExec and WMI commands | Audit |
| Block untrusted and unsigned processes that run from USB | Block |
| Block Adobe Reader from creating child processes | Block |
| Use advanced protection against ransomware | Block |
- Assign to All devices or a device group and create the policy
7. Set Up Web Content Filtering
Web content filtering lets you block access to websites based on category, providing an additional layer of protection against phishing and malicious content.
- In the Defender portal, go to Settings > Endpoints > Rules > Web content filtering
- Click Add policy
- Name the policy (e.g., “Standard Web Filter”)
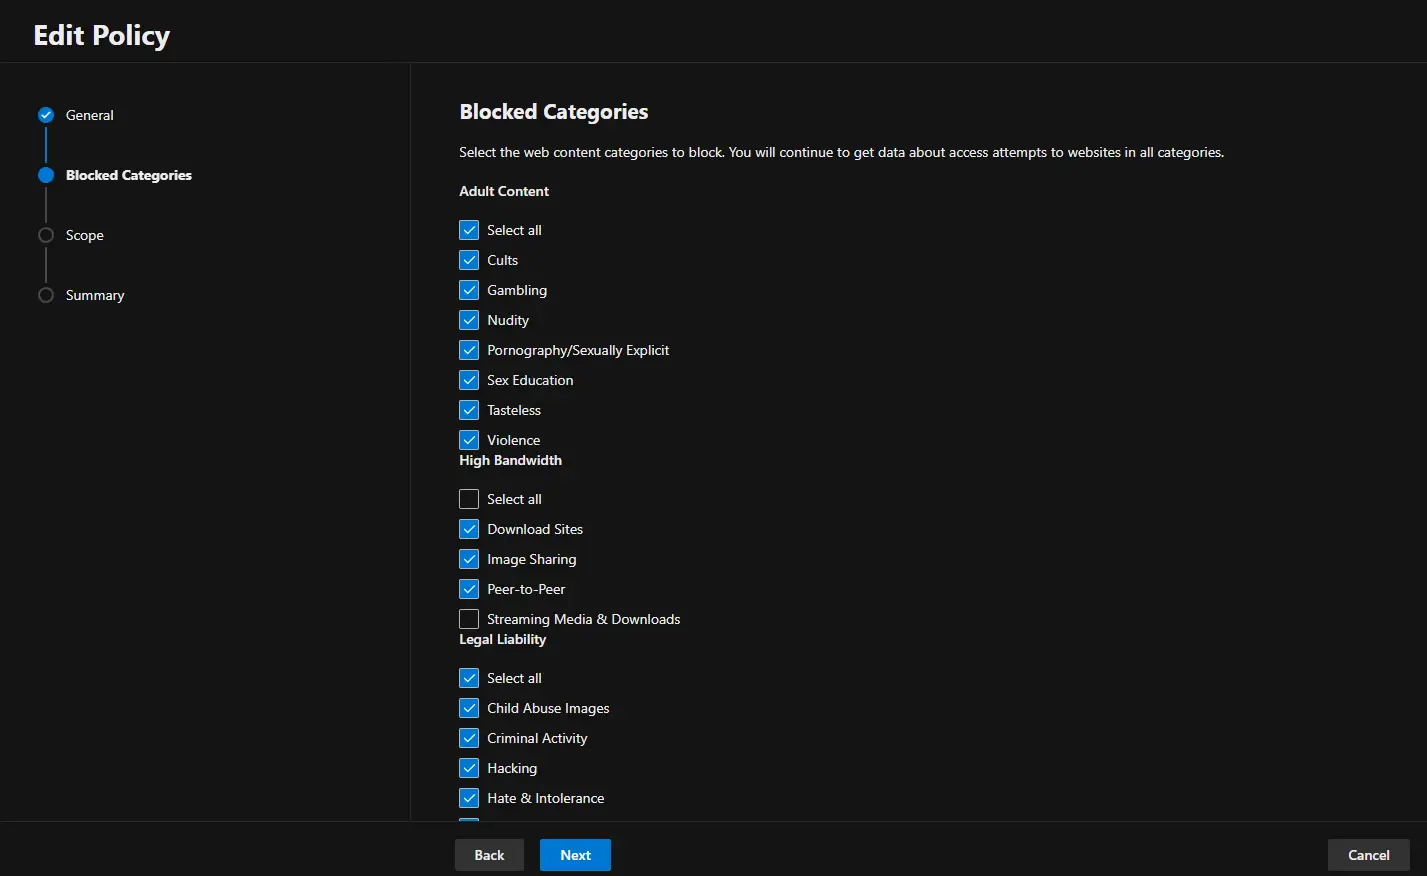
- Select categories to block. Recommended starting point:
- Adult content
- High bandwidth (optional)
- Legal liability — Hacking, Hate & Intolerance, Illegal activities, Malware, Phishing
- Uncategorized
- Apply to All devices or specific machine groups
Web content filtering works with Microsoft Edge natively. For third-party browsers, it requires Network Protection to be enabled (which is included in the MDE onboarding).
8. Onboard Devices via Intune
If you configured the EDR policy in Step 4 with “Auto from connector”, your enrolled devices will begin onboarding automatically once they receive the policy. However, you can verify and manage this process.
- In the Intune admin center, go to Devices > Configuration profiles
- You should see the EDR configuration profile assigned
- Devices will pick up the onboarding configuration during their next Intune sync
To force an immediate sync on a device:
- Open Settings > Accounts > Access work or school
- Click on the connected account, then Info > Sync
Alternatively, from the Intune admin center:
- Go to Devices > All devices, select the target device
- Click Sync from the top menu
9. Verify Onboarding and Test Detection
Once devices have synced, verify they appear in the Defender portal.
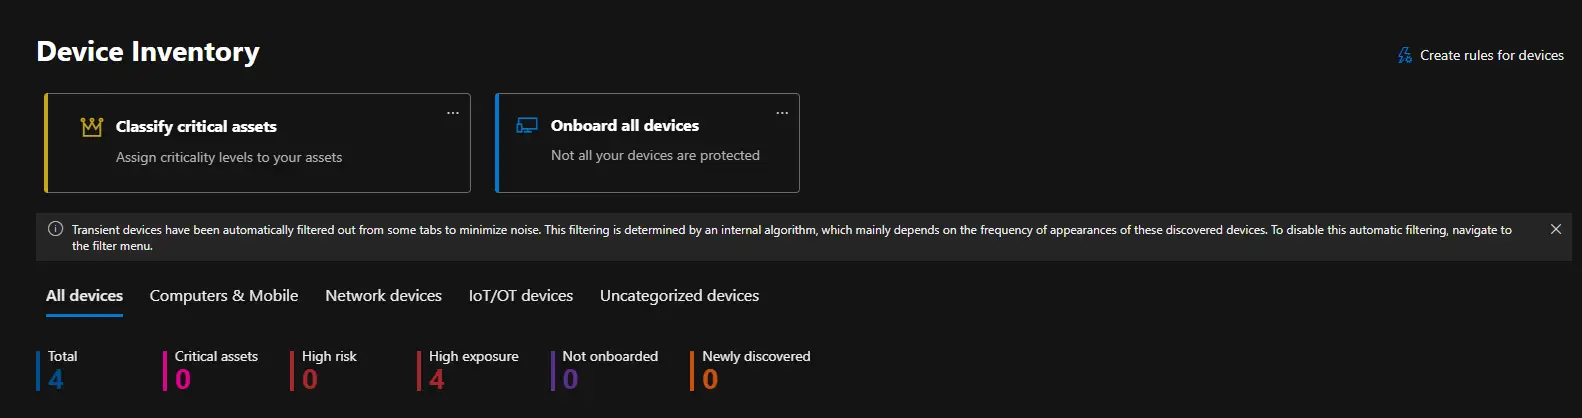
Check the device inventory:
- In the Defender portal, go to Assets > Devices
- Your onboarded devices should appear with a status of Onboarded
- It can take up to 24 hours for a device to appear, but usually much faster
Run a test detection:
Open PowerShell on an onboarded device and run the following:
1
powershell.exe -NoExit -ExecutionPolicy Bypass -WindowStyle Hidden $ErrorActionPreference = 'silentlycontinue';(New-Object System.Net.WebClient).DownloadFile('http://127.0.0.1/1.exe', 'C:\\test-MDATP-test\\invoice.exe');Start-Process 'C:\\test-MDATP-test\\invoice.exe'
This is the official Microsoft test detection command. It is harmless and simply triggers a test alert in the Defender portal. You should see an alert appear within a few minutes under Incidents & alerts > Alerts.
Review the Security Dashboard:
- Navigate to Home in the Defender portal
- You should see your device count, active alerts, and security recommendations
- Check Secure Score for additional hardening suggestions
Conclusion
That covers the full setup of Microsoft Defender for Endpoint with a Business Premium licence. You now have next-gen antivirus, EDR, attack surface reduction, firewall policies, and web content filtering all managed centrally through Intune and the Defender portal. The beauty of Business Premium is that you get all of this included — no additional licensing required.
My recommendation is to start with ASR rules in audit mode, monitor for a couple of weeks, then progressively switch to block mode. This avoids disrupting users while still giving you visibility into what would have been blocked.
Resources
- Microsoft Defender for Endpoint Documentation: https://learn.microsoft.com/microsoft-365/security/defender-endpoint/
- Intune Endpoint Security Documentation: https://learn.microsoft.com/mem/intune/protect/endpoint-security
- ASR Rules Reference: https://learn.microsoft.com/microsoft-365/security/defender-endpoint/attack-surface-reduction-rules-reference
- Business Premium Security Features: https://learn.microsoft.com/microsoft-365/business-premium/m365bp-security-overview